Weekly Report
Instructions for sending weekly reports for sales staff.
Guide Content
Data Entry Screen for Salesman Reports
1. How to Access the Report Creation Screen
- Step 1: Click on the company logo at the top left corner of the screen to open the list of modules.
- Step 2: In the User section, select
CRM. - Step 3: On the toolbar, select
Report.
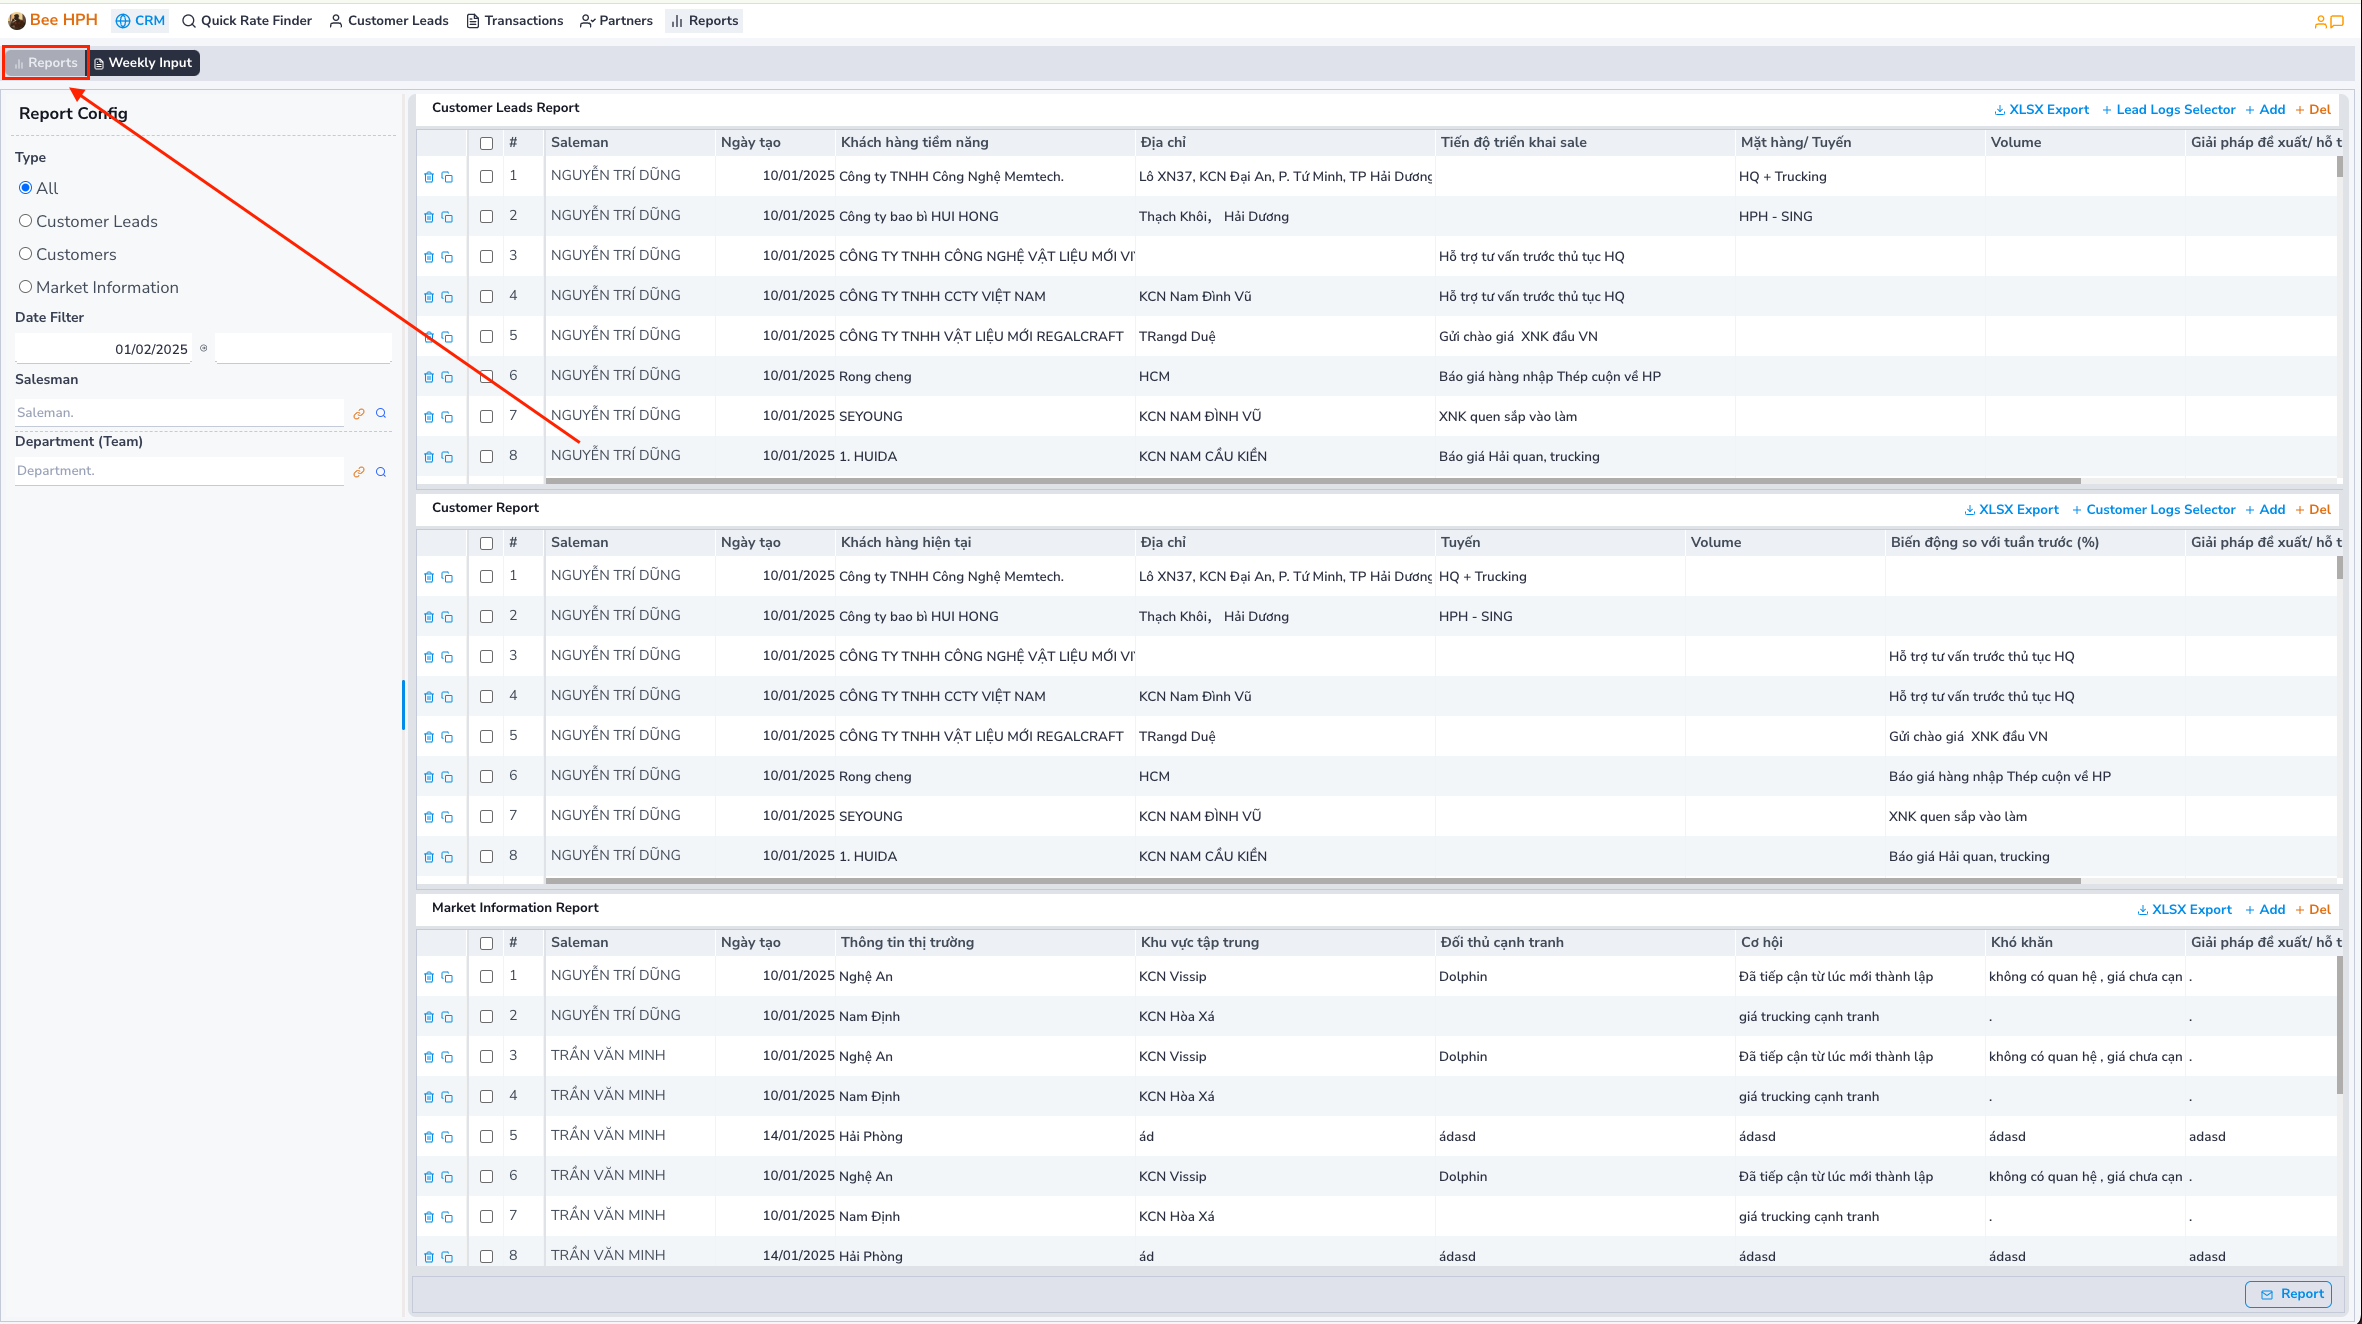
The report section consists of 2 main screens:
- Summary screen (
Report) (by each sales team, office, ... as set up from the system). - Data entry screen for each salesman (
Weekly Input)
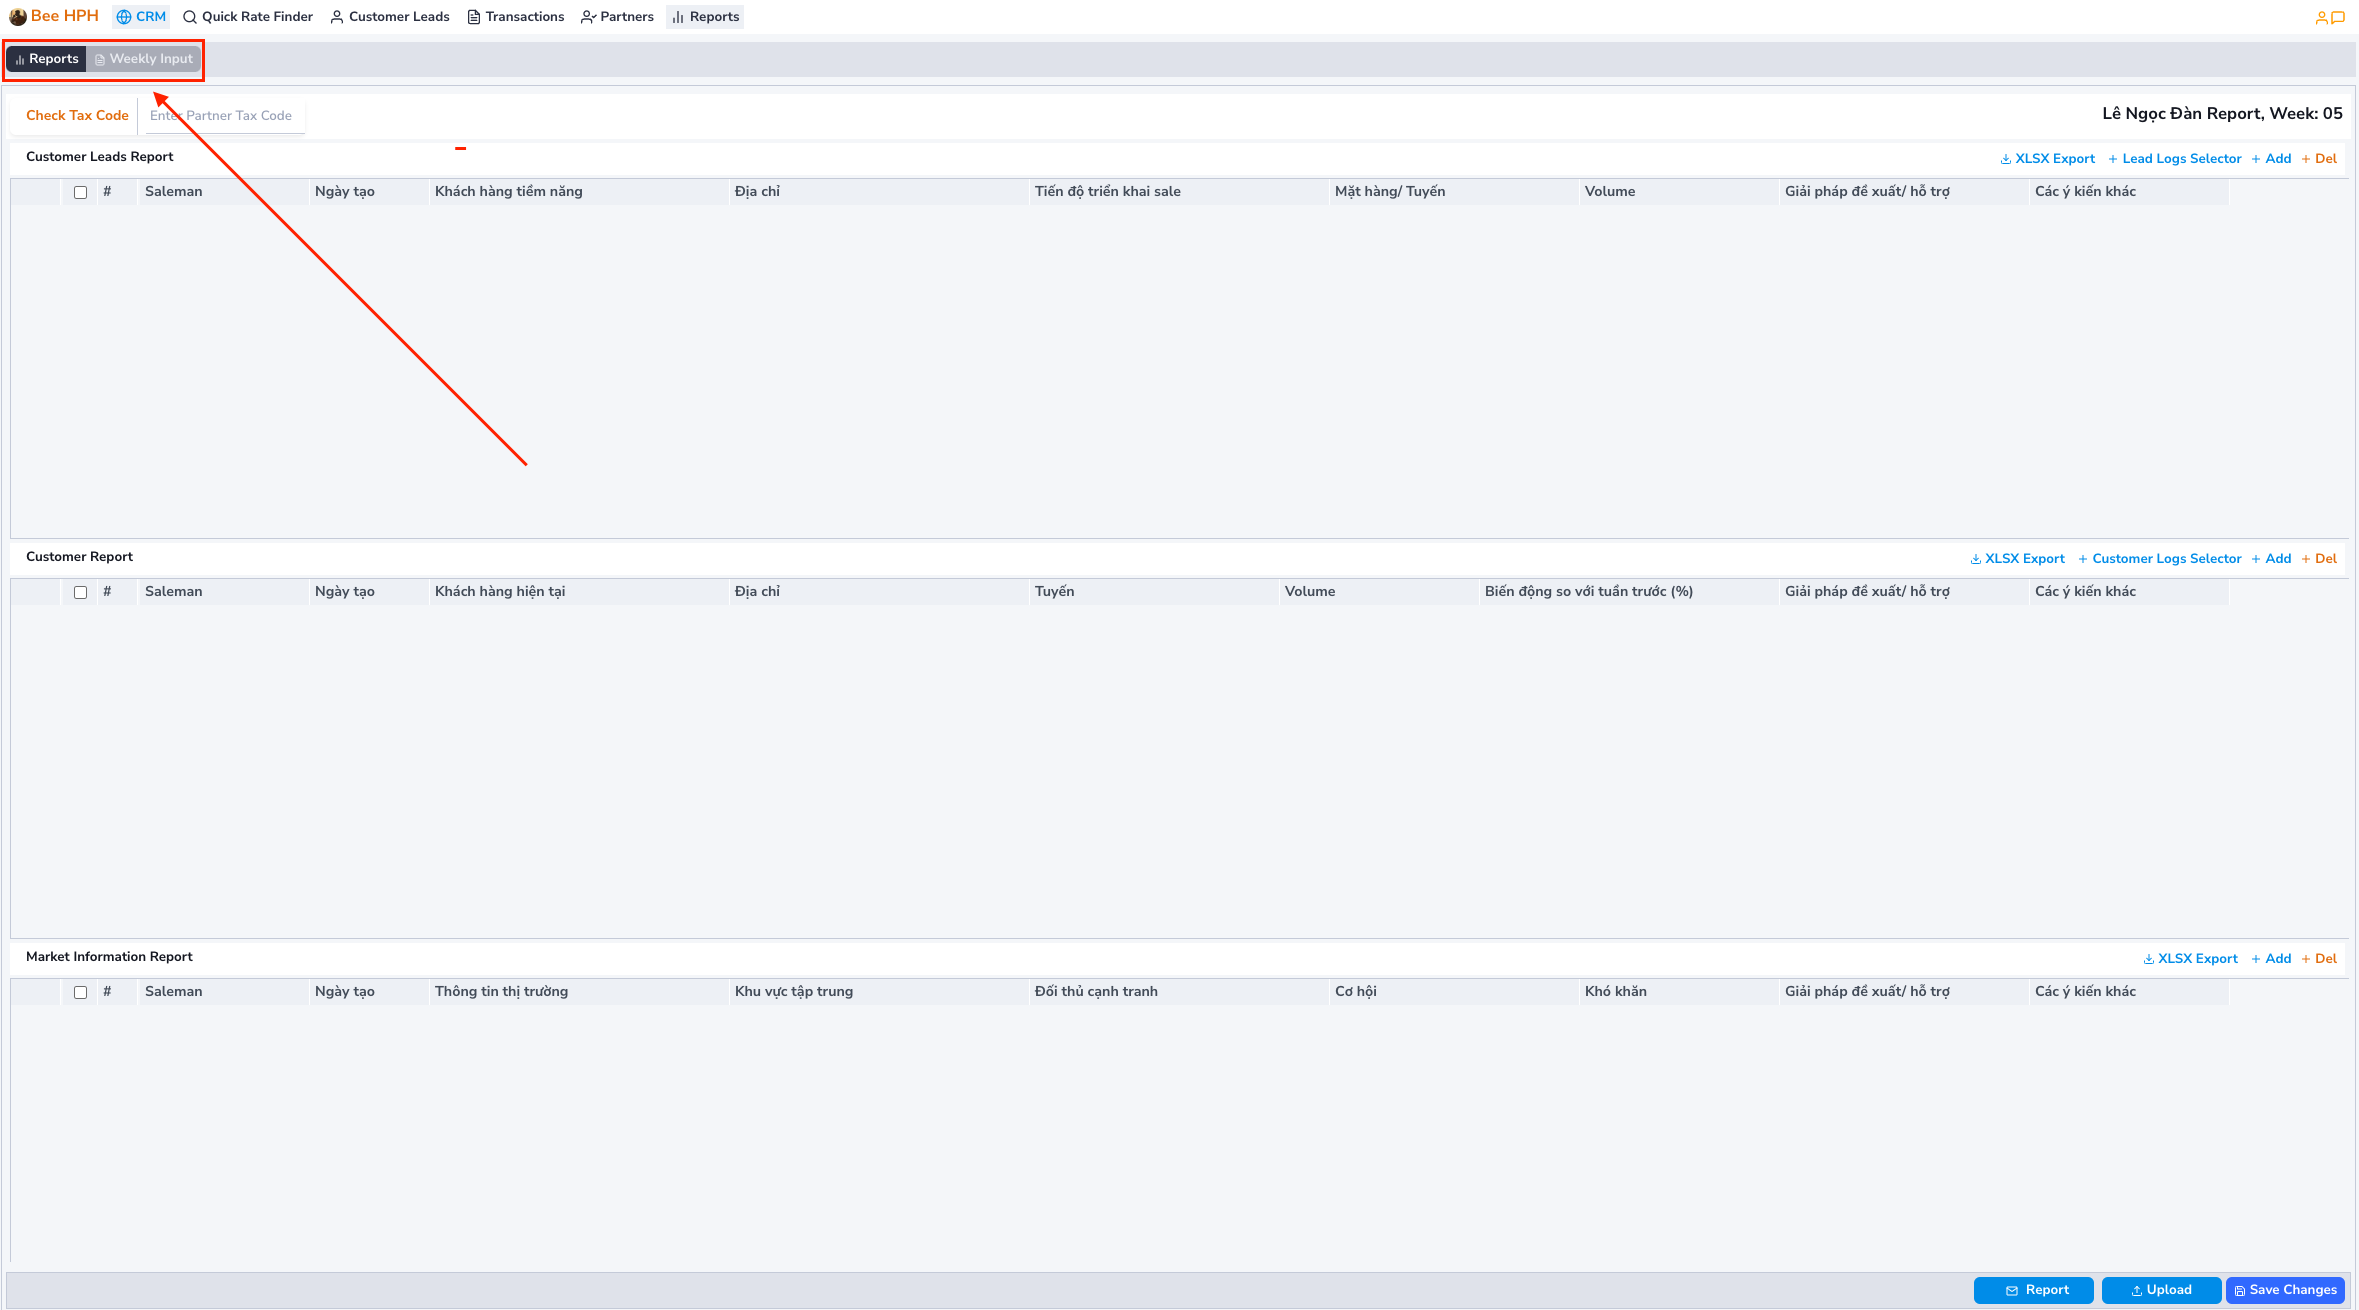
By default, the software opens the current weekly report data entry screen (Weekly Input), which includes 3 sections:
- Customer Lead Report: Report on potential customers.
- Customer Report: Report on current customers.
- Market Information Report: Report on market information.
2. Instructions for Operations on the Report Screen
On each report screen, you will see the following function buttons:
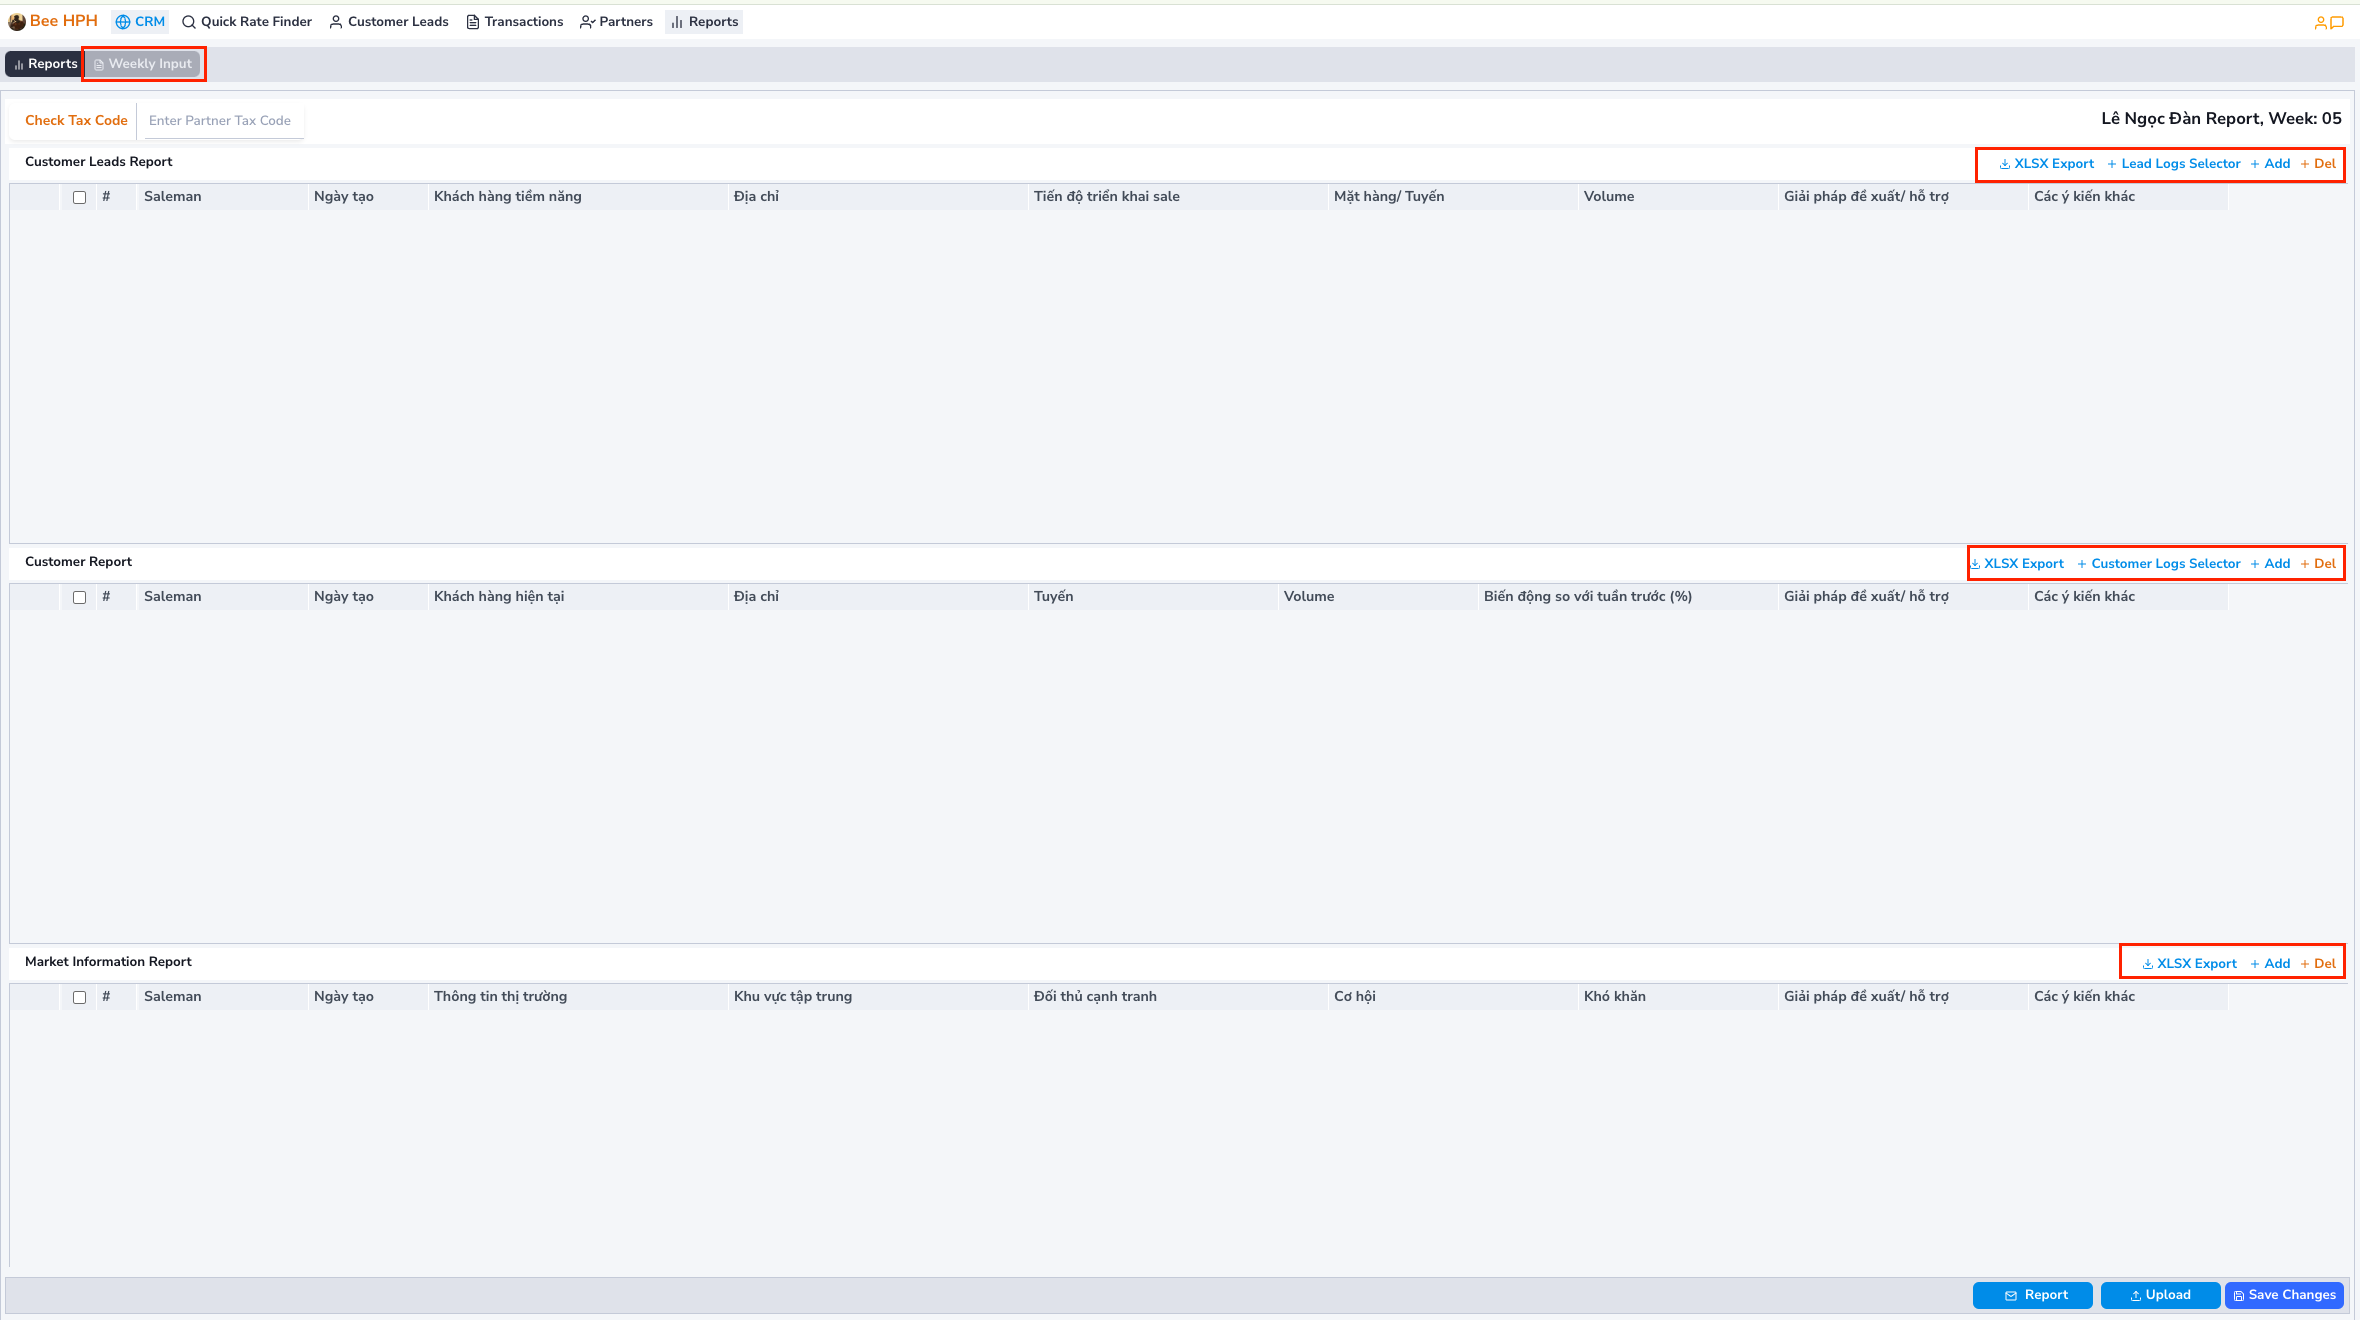
- Add: Add a new row to the report.
- Del: Delete the selected report row.
- XLSX Export: Export data to an Excel file.
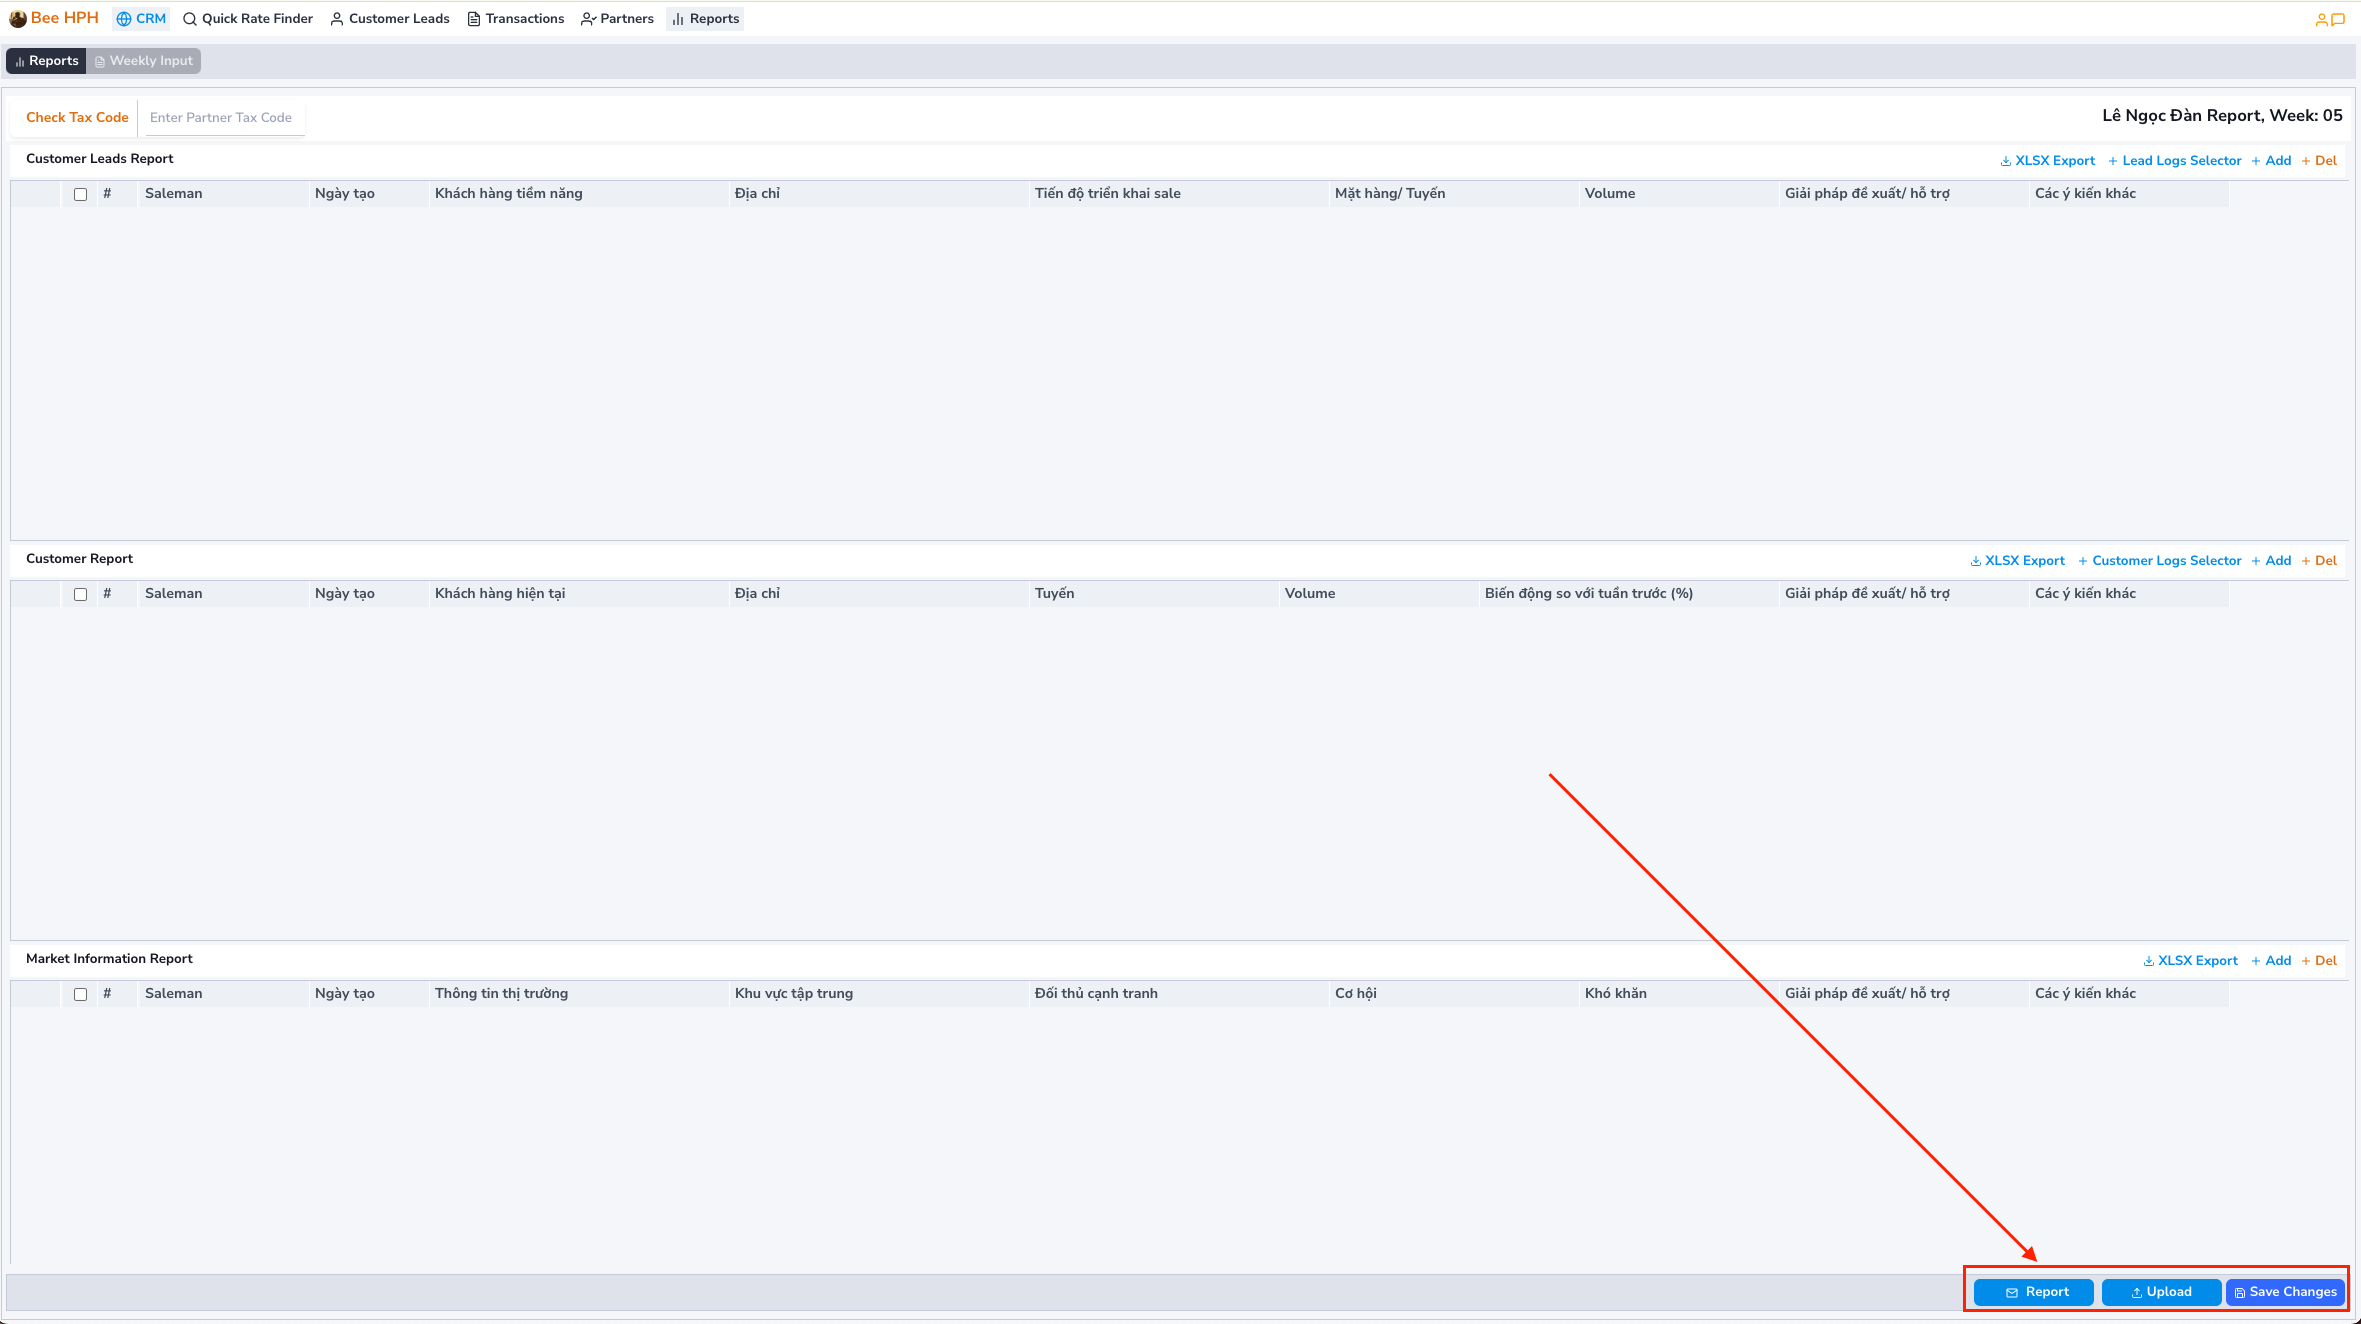
-
Report: Send the report via email.
-
Upload: Upload data from an Excel file in the specified format.
-
Save Changes: Save changes on the screen.
Summary Screen of Report Data by Group, Office